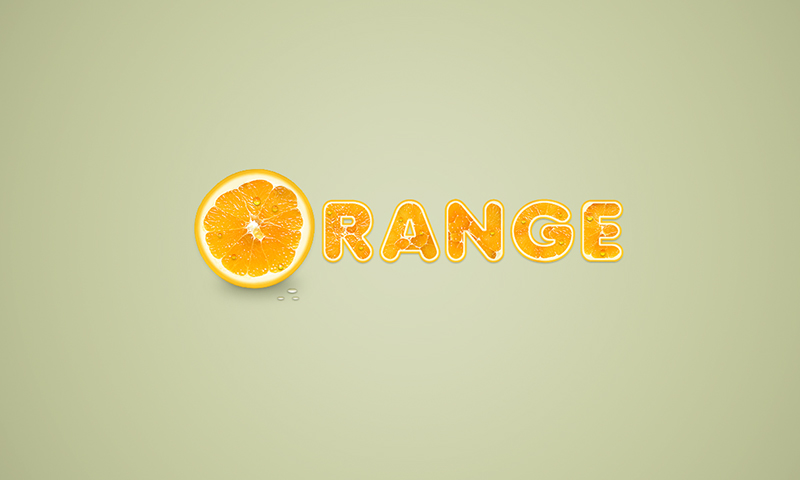
Learn step by step how to create a cool orange fruit text effect in Photoshop
In this Photoshop tutorial i will show you how to create a cool orange text effect. The basic techniques used in this tutorial will show you how to transform a simple flat text to cool text effect. If you love oranges like me read this tutorial step by step. You can also use this tutorial to create the same text but with other fruits like strawberry, kiwi or anything you like.
Tutorial Details and Resources
Difficulty: Intermediate
Apps Used: Adobe Photoshop (CS5 or later)
Estimated Completion Time: 20-45′ Minutes
Resources:
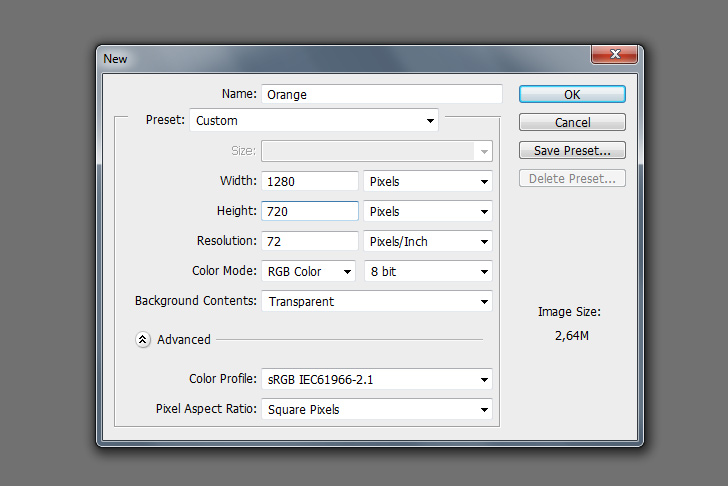
Orange slices by RegoStep 1 > Create a New Document
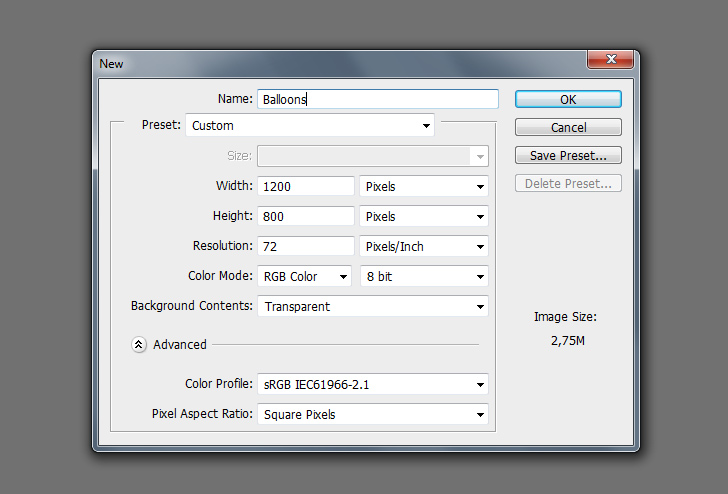
For this tutorial create a new document with 1280px width and 720 height.
Step 2 > Create the Background
Use #
c4c99b as your foreground color and fill the empty layer using Paint Bucket Tool (
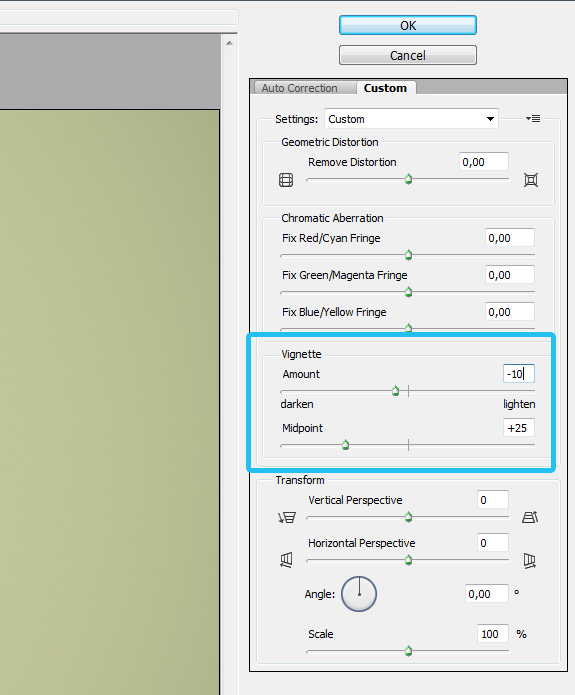
G) and rename the layer to “Background. To add vignette effect go to Filter > Lens Correction, in the “Custom” tab add -10 Vignette Amount, 25 Midpoint and press OK.
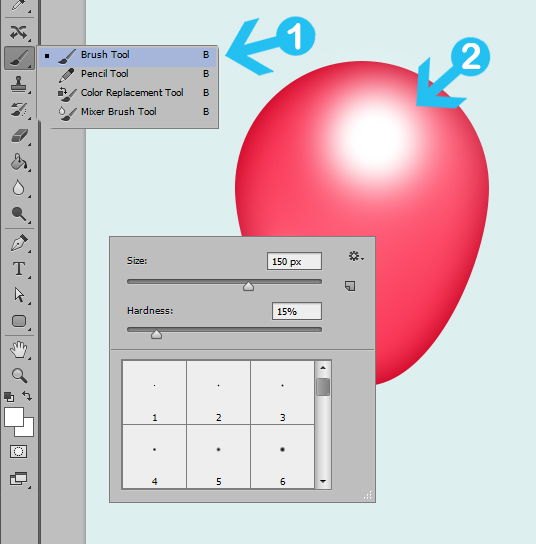
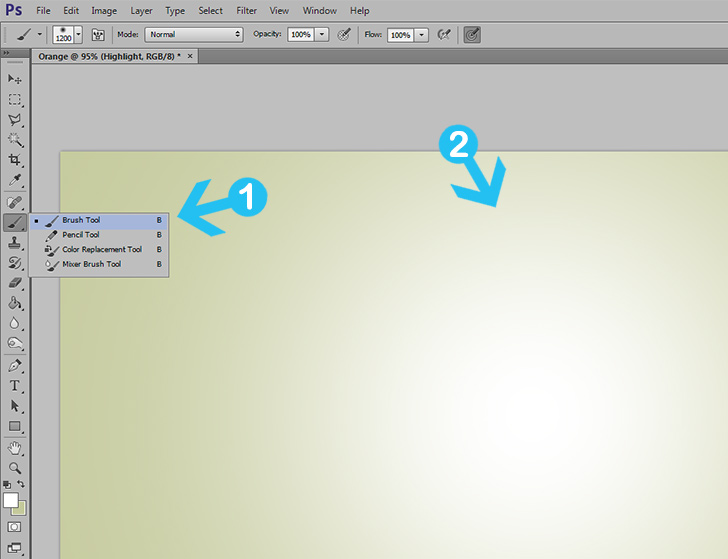
Next, go to Layer > New > Layer to create a new layer. Rename the layer to “Background Highlight”. To add a highlight pick the Brush Tool (
B) with 1200px size and 0 Hardness. Paint in the middle of your canvass and lower the Opacity to 35%.
a) Fill the background with #
c4c99b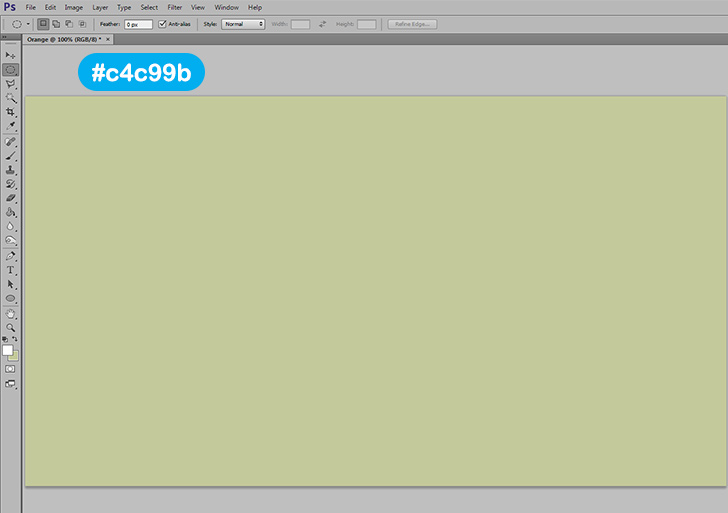
b) Add -10 Amount and +25 Midpoint Vignette.
c) Use a large brush (1200px) and paint over the canvas. Turn opacity to 35%.
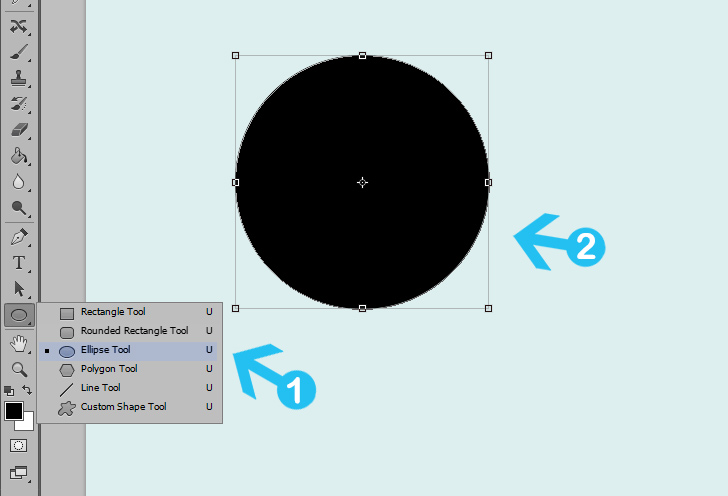
Step 3 > Create the “O” Shape
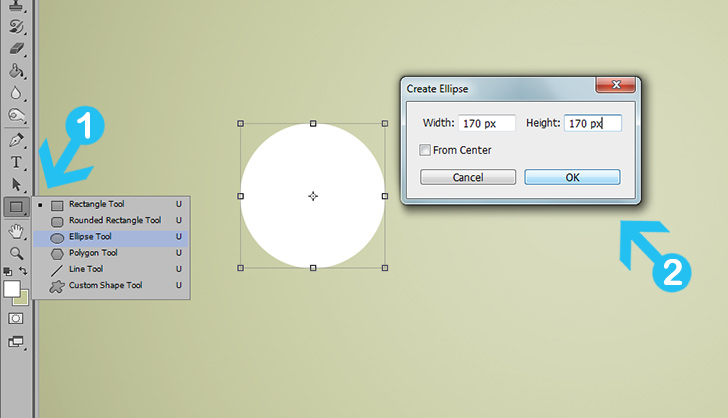
Set your foreground color to white and in your toolbox pick the Ellipse Tool (
U). Press left click on your canvas and in the new tab change width and height to 170px. Press OK to create the shape.
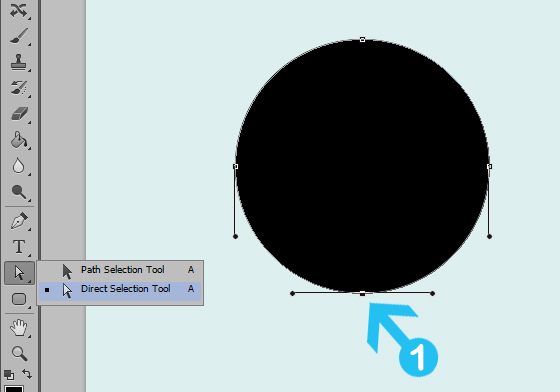
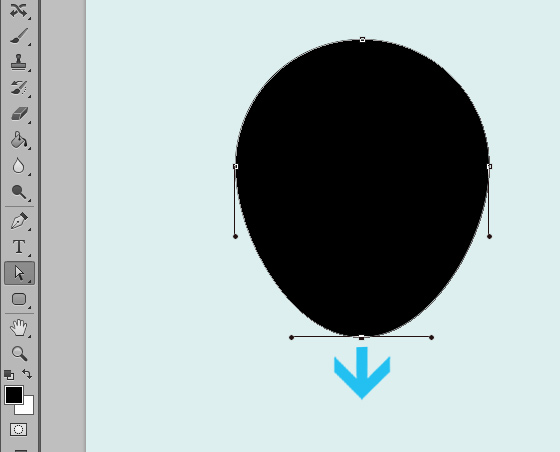
Step 4 > Transform the Shape
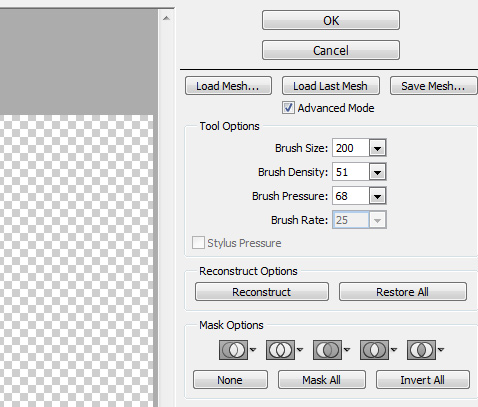
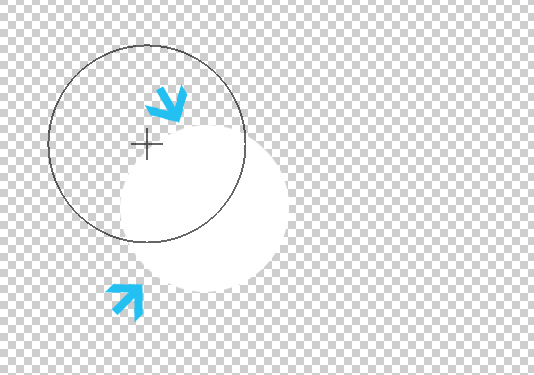
To make the shape similar to oranges with the shape layer active go to Filter > Liquify and pick the Forward Warp Tool. For Tool Options use 200 Brush Size, 51 Brush Density and 68 Brush Pressure. Push carefully the left upper corner and left lower corner down. When you are happy with the result press OK.
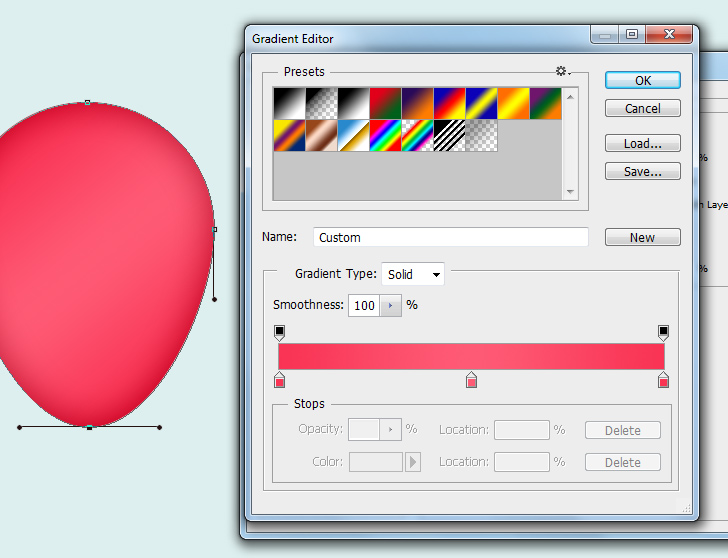
Step 5 > Blending Options
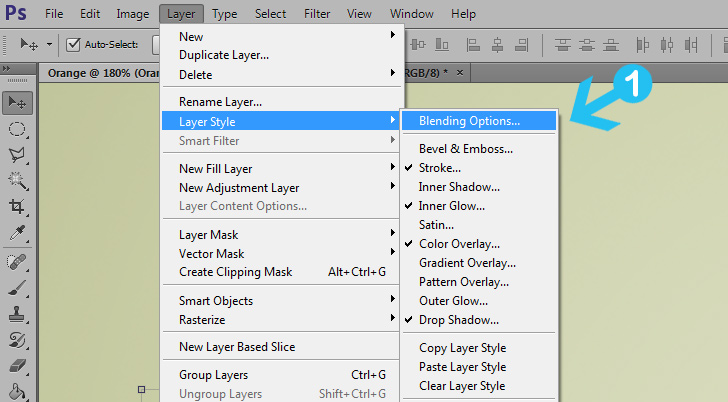
To create the orange look go to Layer > Layer Style > Blending Option and add the following values:
a) First go to Blending Options.
b) Add
Drop Shadow with black color and Blend Mode to Linear Burn. Set Opacity to 19%, Distance to 4, Spread to 0 and Size to 10.

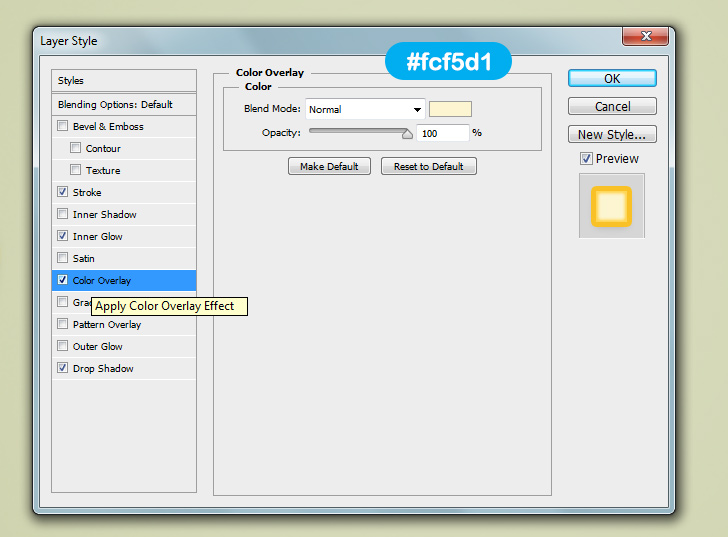
c) Add
Color Overlay with
#fcf5d1 color and Blend Mode to Normal. Set Opacity to 100%.
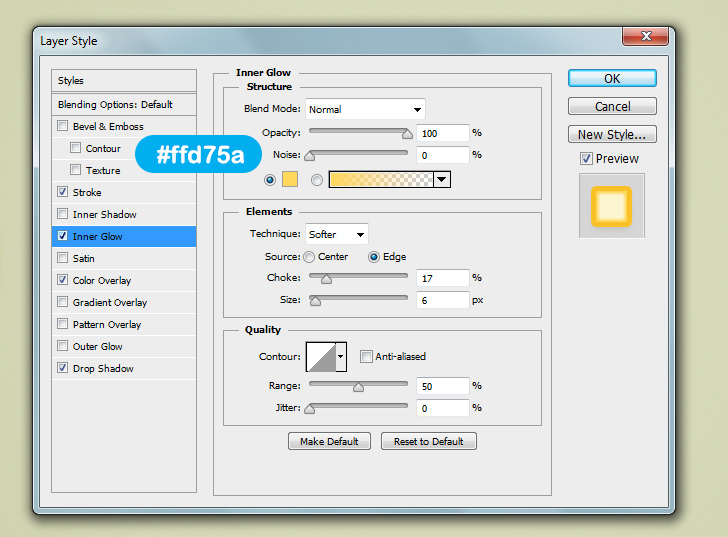
d) Add
Inner Glow with
#ffd75a color and Blend Mode to Normal. Set Opacity to 100%. Choke 17% and Size 6px.
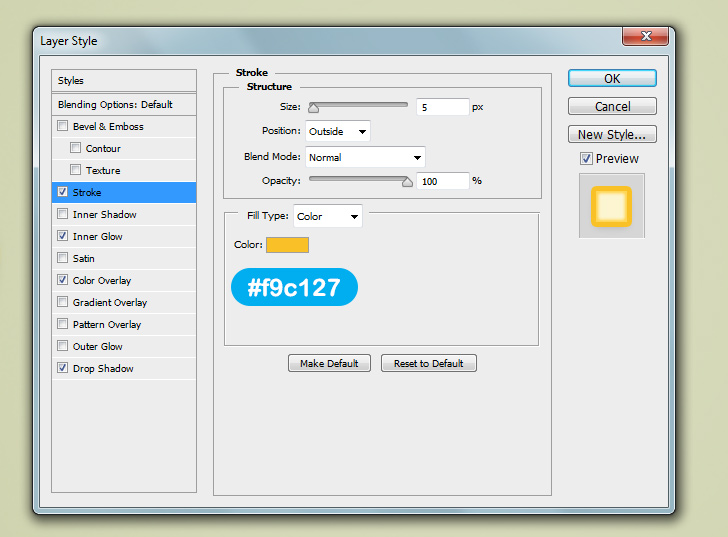
e) Add
Stroke with
#f9c127 color and Blend Mode to Normal. Set Opacity to 100% and Size to 5px.
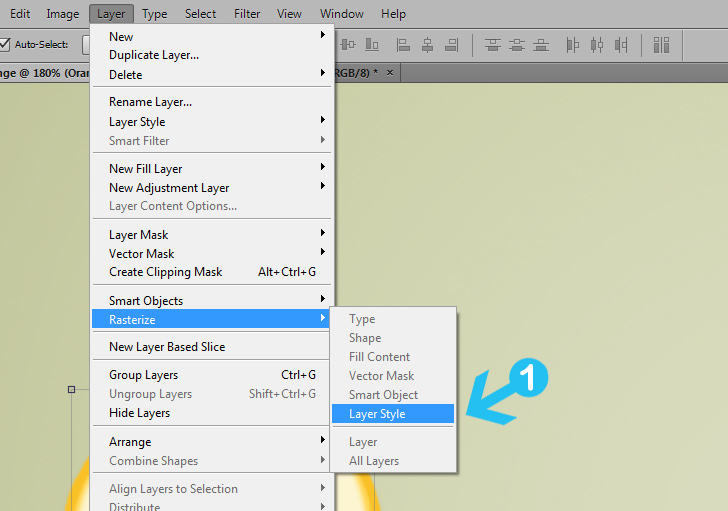
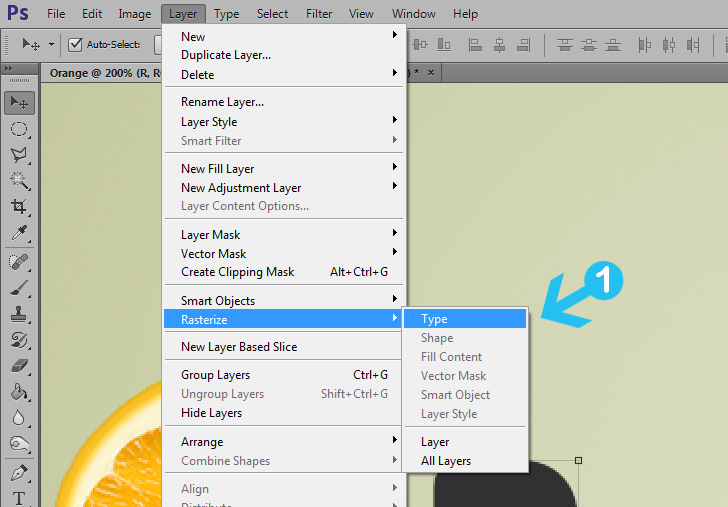
Step 6 > Rasterize the Shape
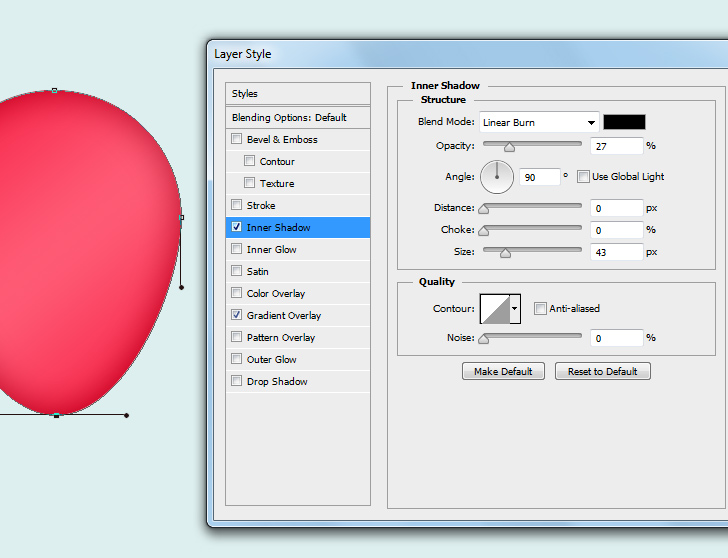
Go to Layer > Rasterize > Layer Style to rasterize the shape. Next, go again to Layer > Layer Style > Blending Options and add Inner Shadow with the follow settings:
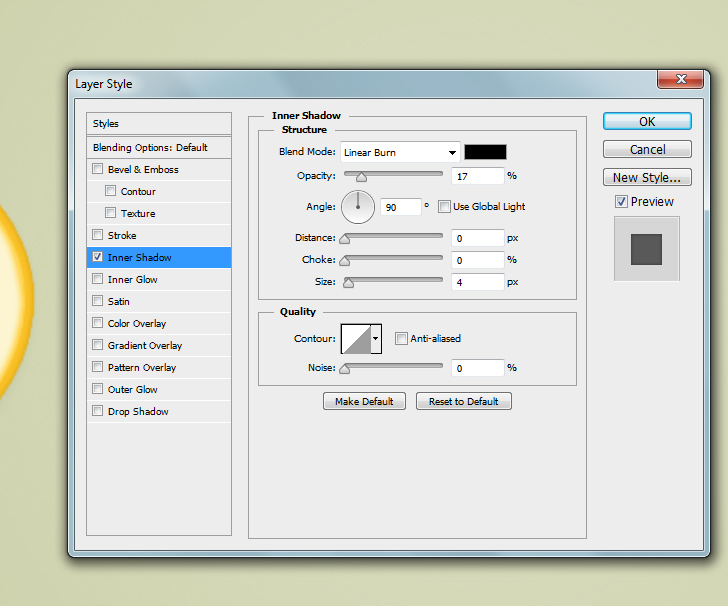
 Inner Shadow
 settings: Blend Mode: Linear Burn, black color, Opacity: 17%, Angle 90, Size: 4, distance and choke 0.
Step 7 > Orange Texture
Download and open the
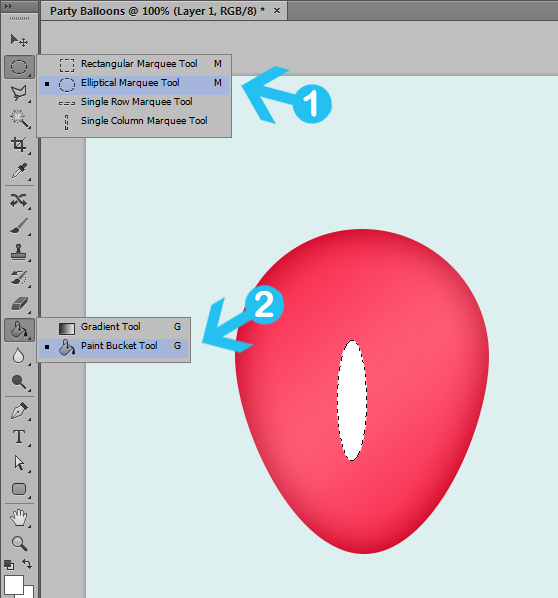
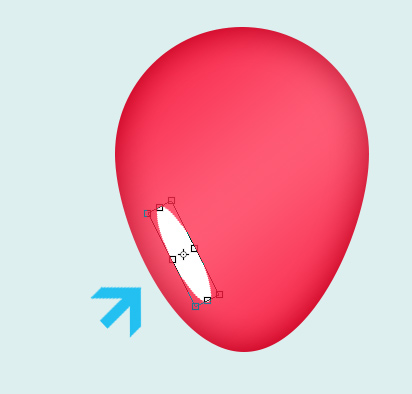
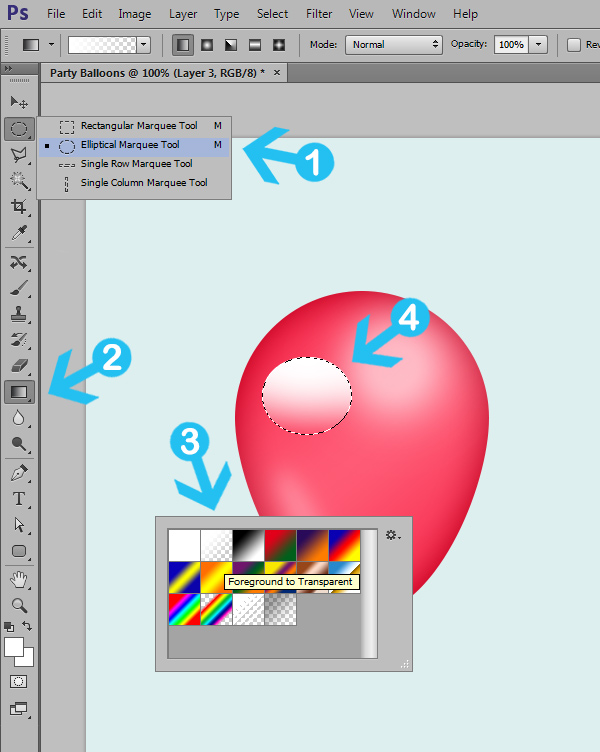
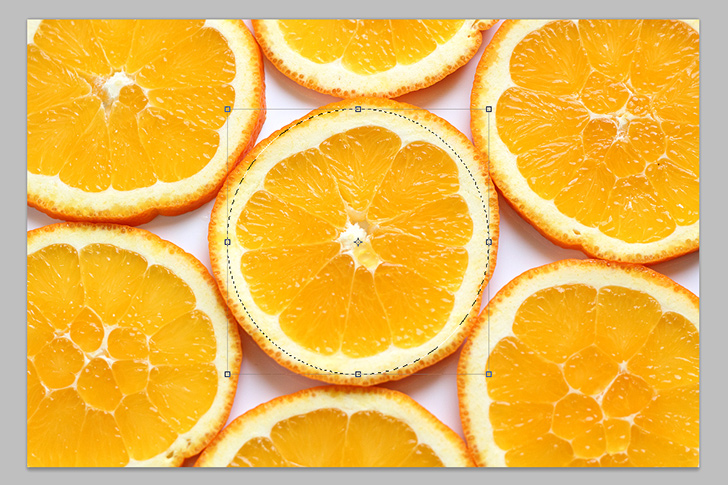
orange slices image in a new Photoshop document. Select the middle orange slice with Elliptical Marquee Tool and press (Ctrl + C) on your keyboard to copy the selection. Go back to your Orange document and press (
Ctrl +
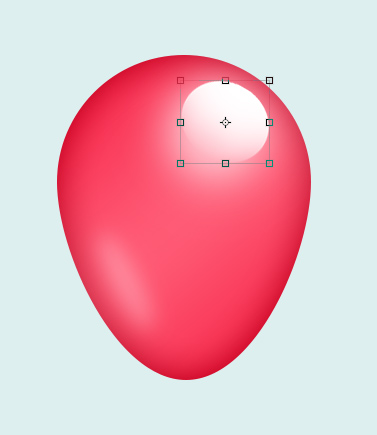
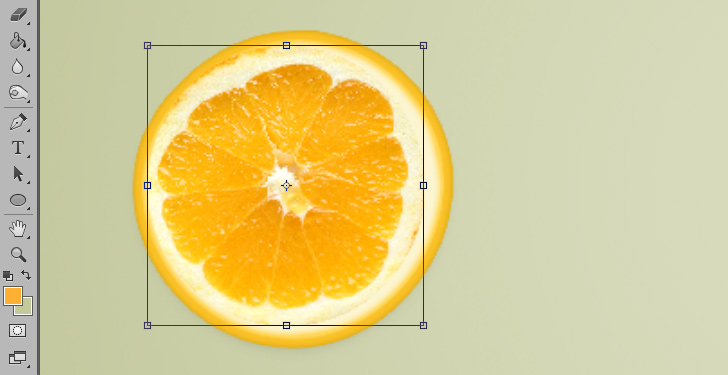
V) to paste the selection. Next, transform the orange texture to fit the “O” shape.
Step 8 > Refine Selection
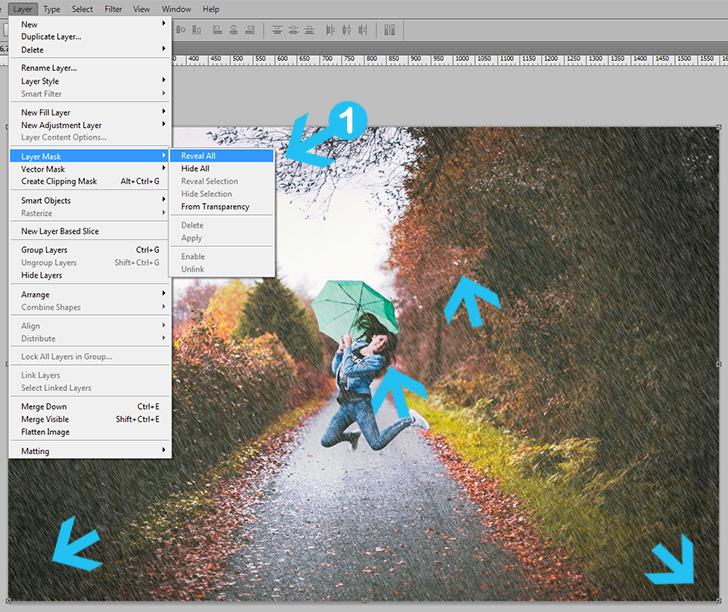
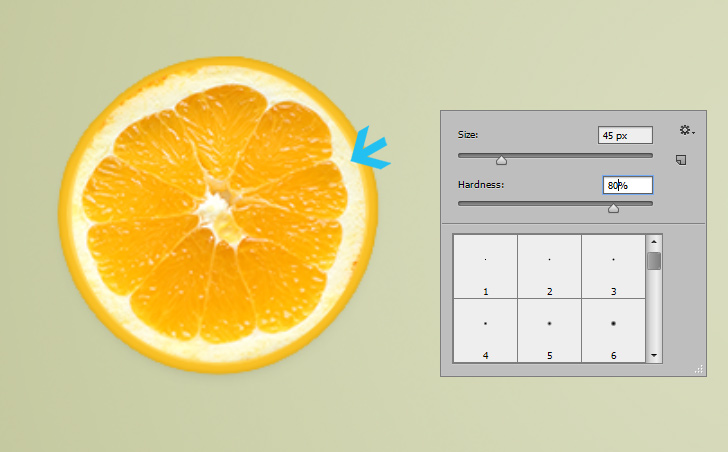
To refine the orange slice we must add a Layer Mask. Go to Layer > Layer Mask > Reveal All to create one. Pick the Brush Tool (
B) with black color, 45px size and 80% hardness. Paint over the white orange texture and leave only the “heart” of orange.
a) Add Layer Mask.
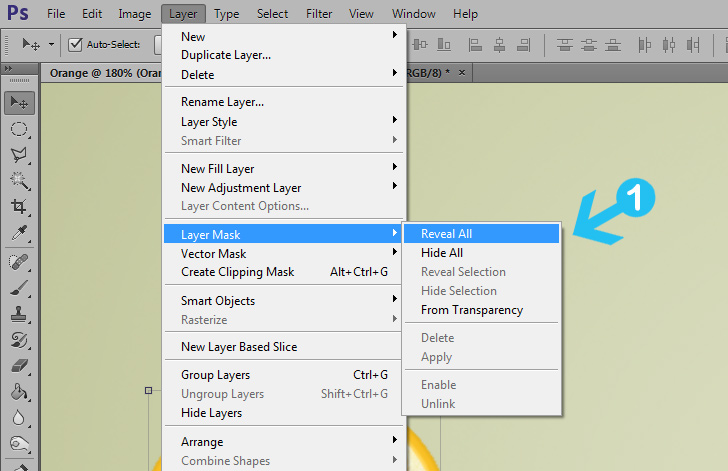
b) Refine the texture.
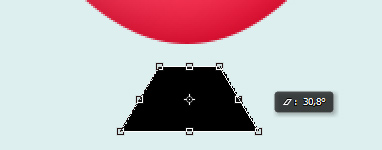
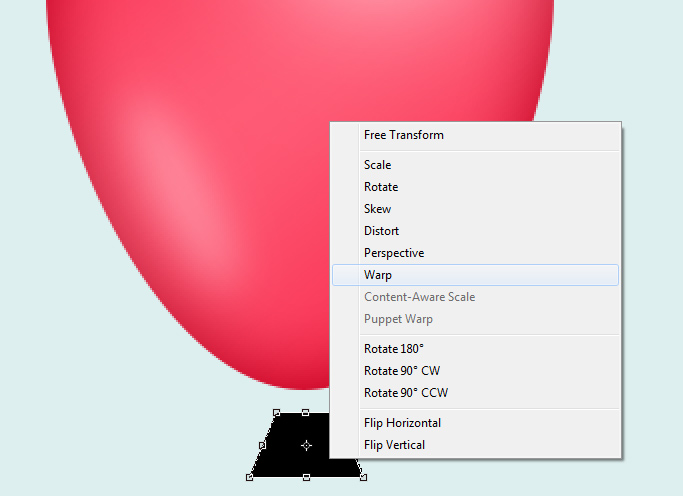
Step 9 > Create the Shadow
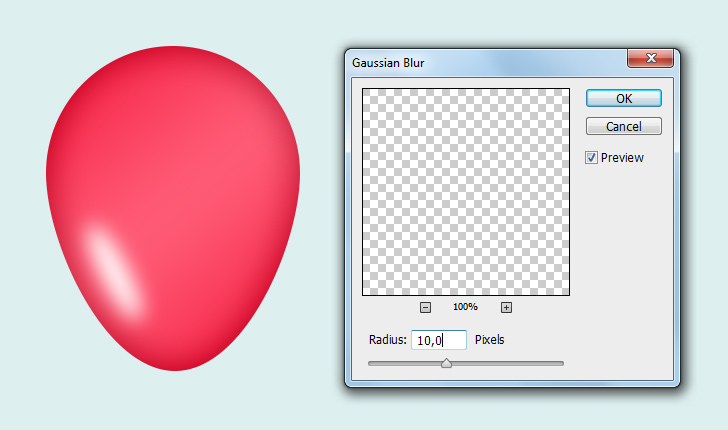
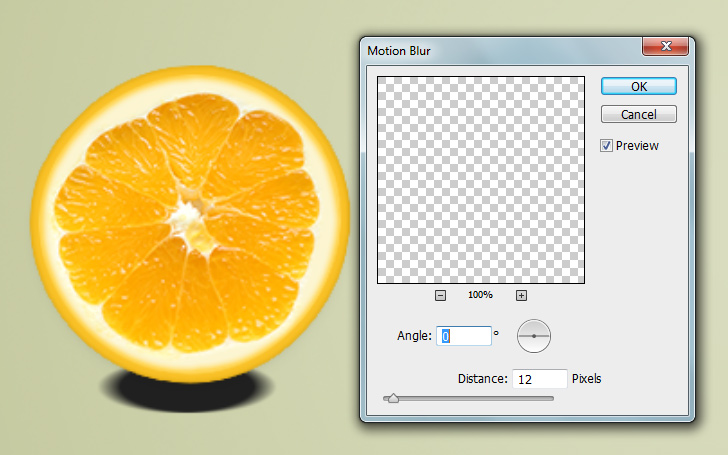
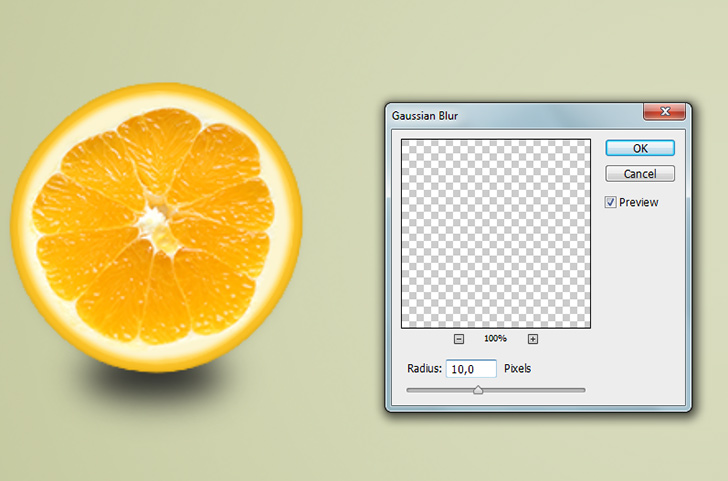
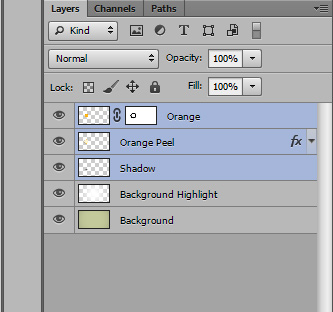
Create a new layer under the orange shapes and name it “Shadow”. With Elliptical Marquee Tool create a small selection under the orange shapes and fill it with black color. Go to Filter > Blur > Motion Blur, add 12px value and press OK. Next, with the “Shadow” layer still active to go Filter > Blur > Gaussian Blur, add 10px Radius and press OK. Last, organize the 3 layers (Orange , Peel, Shadow) by pressing (Ctrl +G) to create a group like the image (c).
a) Add Motion Blur (12px).
b) Add Gausian Blur (10px).
c) Select the layers and Press (
Ctrl +
G) to group them.
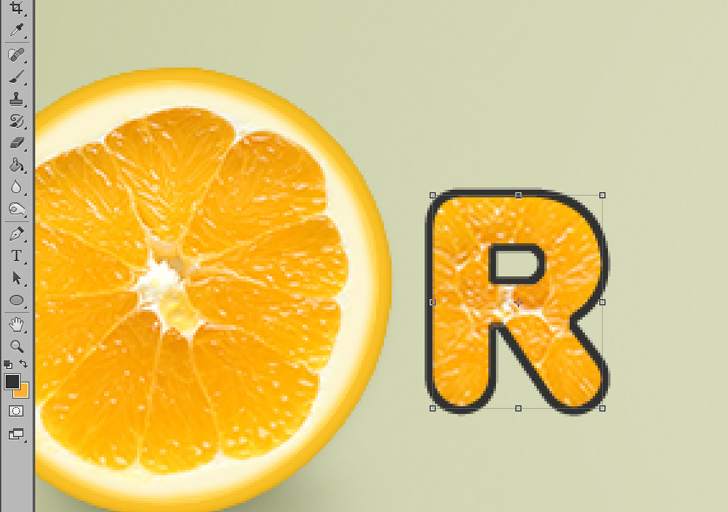
Step 10 > Letter “R”
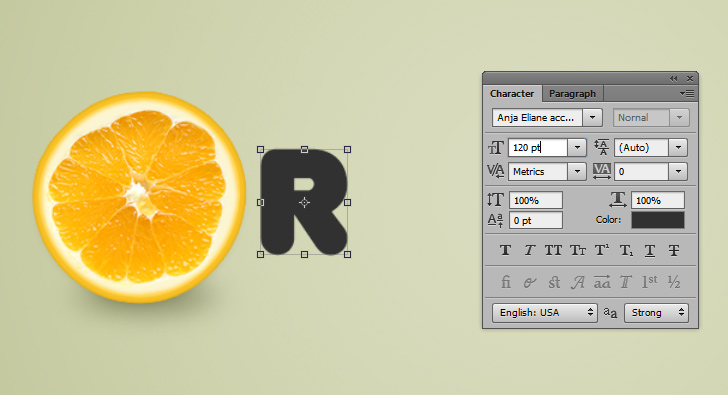
To create the letter “R” pick the Text Tool (
T) and write the letter. Use “Anja Eliane accent” font or similar rounded bold font with 120pt text size. Use grey or any color you like because we will use the letter only as base. Next, go to Layer > Rasterize > Type to rasterize the text.
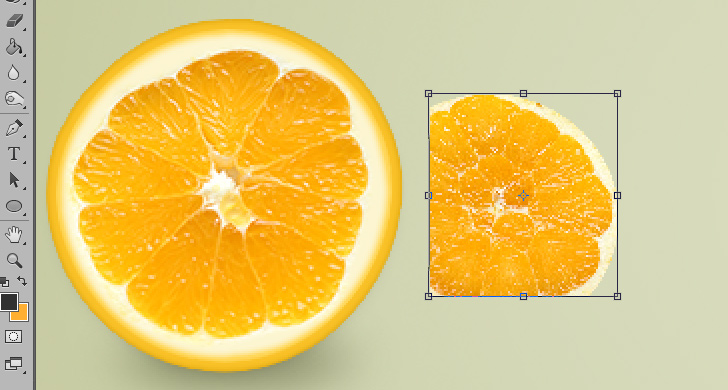
Step 11 > Orange Texture
Similar to step 7, copy (
Ctrl +
C) another orange slice texture and paste (
Ctrl +
V) it to your Orange document. Transform the texture to fit the “R” shape and confirm.
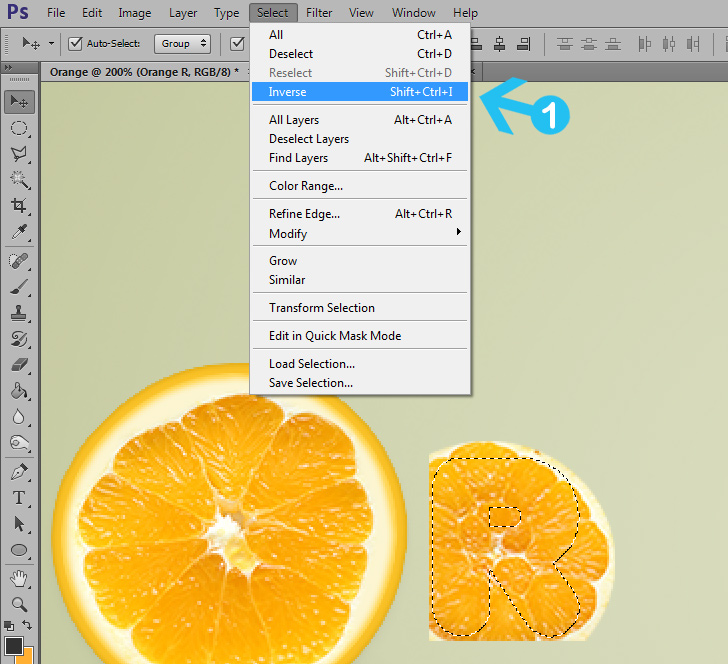
With the orange texture layer selected press (
Ctrl + Left
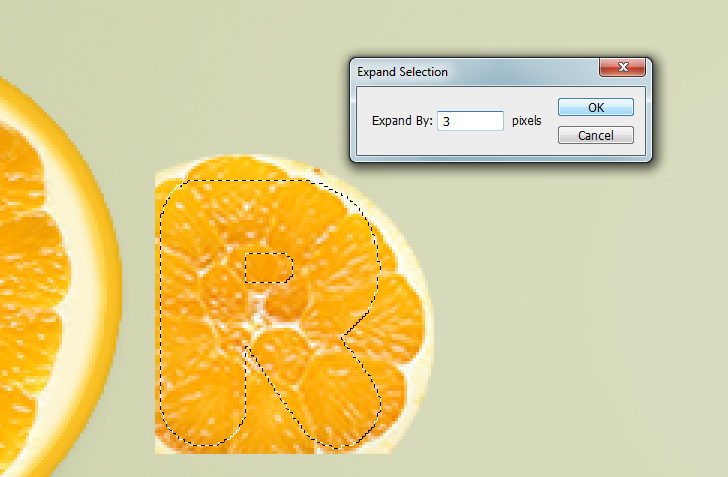
Click) on the “R” shape layer to select the pixels. Go to Select > Inverse to inverse the selection. Next, go to Select > Modify > Expand, in the new tab use 3 pixels and press OK. Press (
Delete ) on your keyboard and (
Ctrl +
D) to deselect.
a) Transform the orange texture.
b) Inverse the “R” shape selection.
c) Expand by 3 pixels.
d) Final result.
Step 12 > Peel Texture
Select the “R” shape layer and go to Layer > Layer Style > Blending Options to add the follow settings:
a) Add
Stroke: Size: 2, Opacity 100%, Color: #
f9c127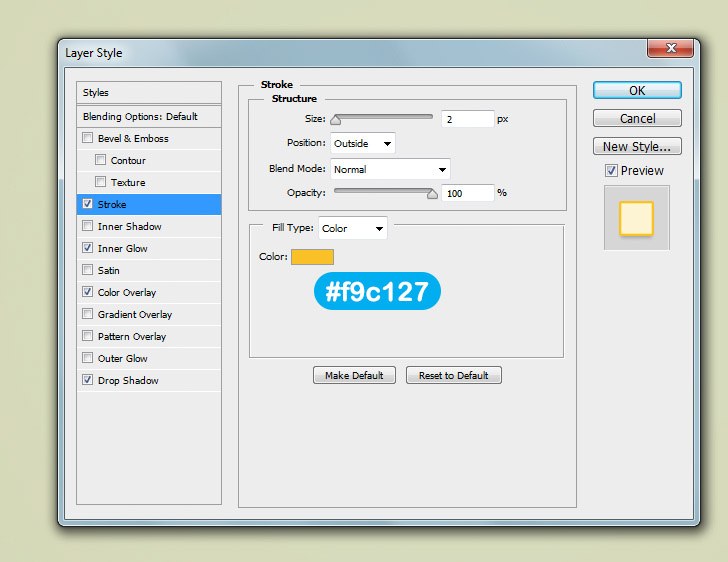
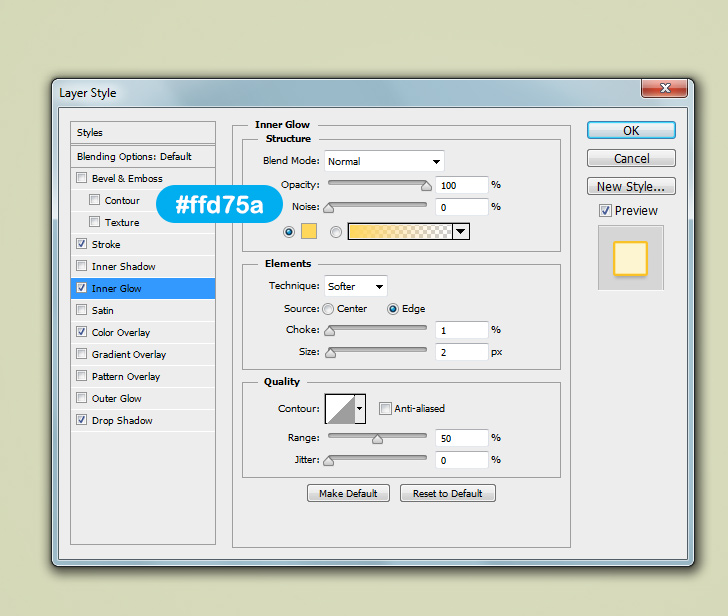
b) Add
Inner Glow: Blend Mode: Normal, Opacity 100%, Color: #
ffd75a, Choke: 1 and Size: 2.
c) Add
Color Overlay: Blend Mode: Normal, Opacity 100%, Color: #
fcf5d1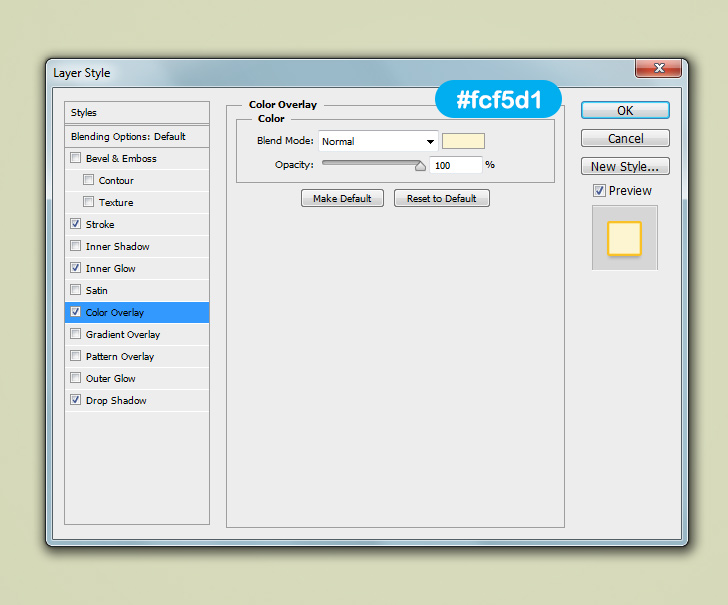
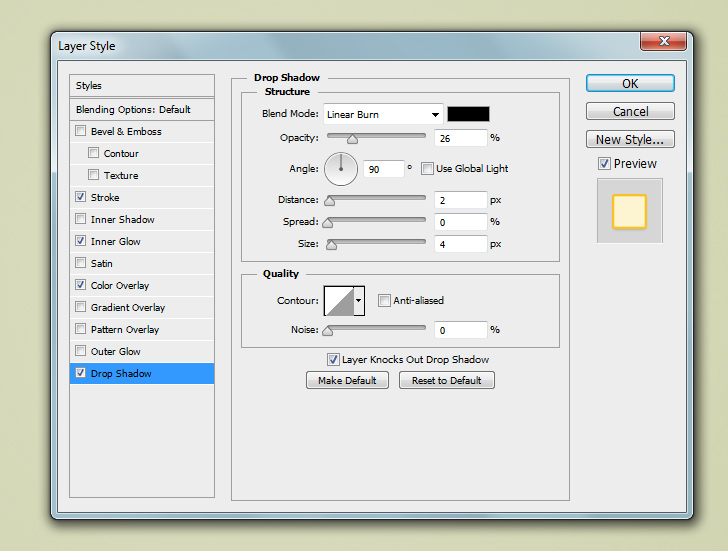
d) Add
Drop Shadow: Blend Mode: Linear Burn, Opacity 26%, Color: #
000000, Angle: 90, Distance: 2, Spread: 0 and Size 4.
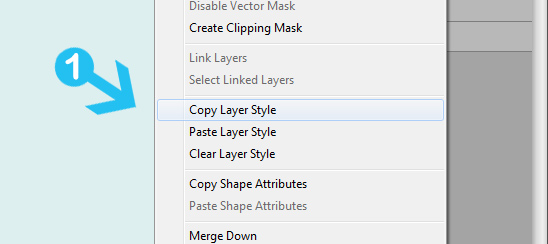
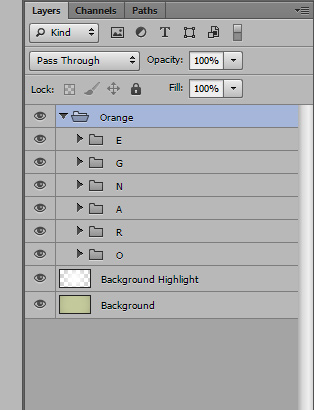
Step 13 > Group and Align
Group every type letter to different group folder by selecting the layers and pressing (
Ctrl +
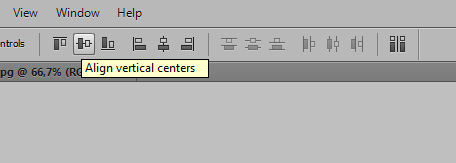
G). Group all smaller groups to one main group. To align the text, with the main group layer active press (
Ctrl +
A) and in top panel use the aligment buttons to center the text.
a) Group layers example.
b) Align the text vertically and horizontally.
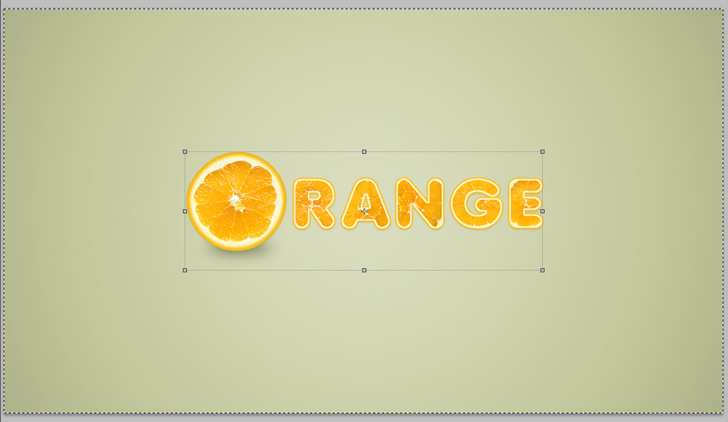
c) Centered text.
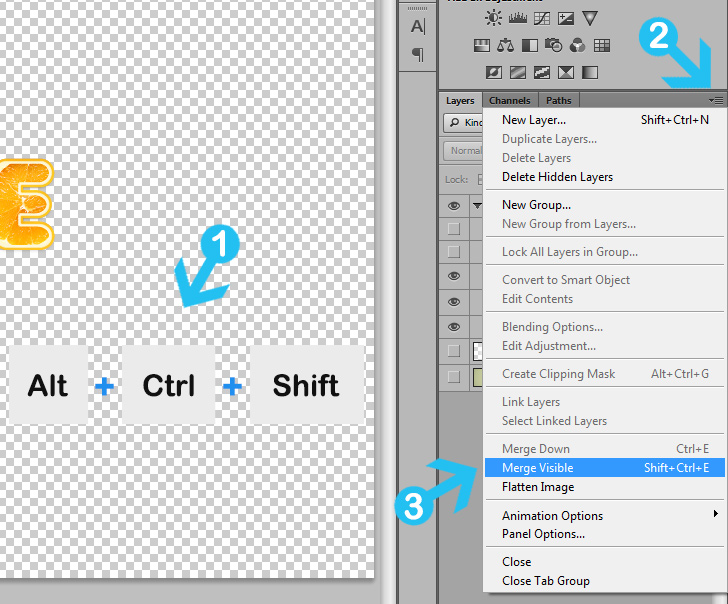
Step 14 > Merge Layers
While pressing (
Alt +
Ctrl +
Shift) go to layer options menu and press Merge Visible. This will create a new merged layer on top, but will leave all the previews layers untouched.
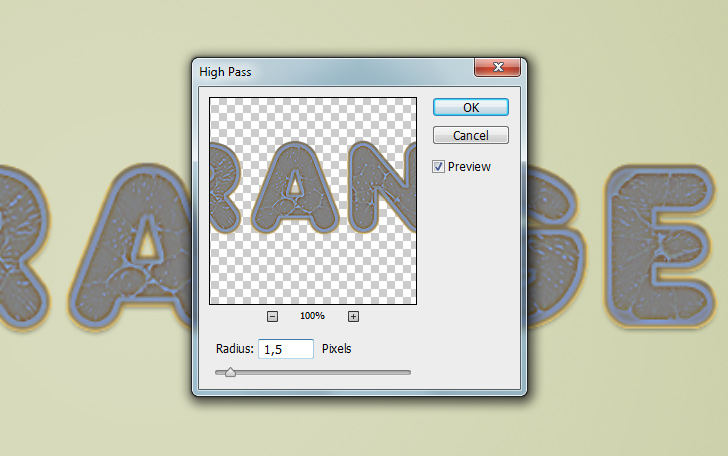
Step 15 > Text Sharpening
To sharpen the text go to Filter > Other > High Pass and in the new tab enter 1,5 – 2 pixels Radius and press OK. Next, turn the layer Blending Mode to Soft Light.

a) Add between 1,5 – 2px Radius and press OK.
Step 16> Juice Drops
We can finish here but if you want to add some realistic juice drops and make the text look fresh, read this quick tutorial:
Create Realistic Water Drops in PhotoshopConclusion
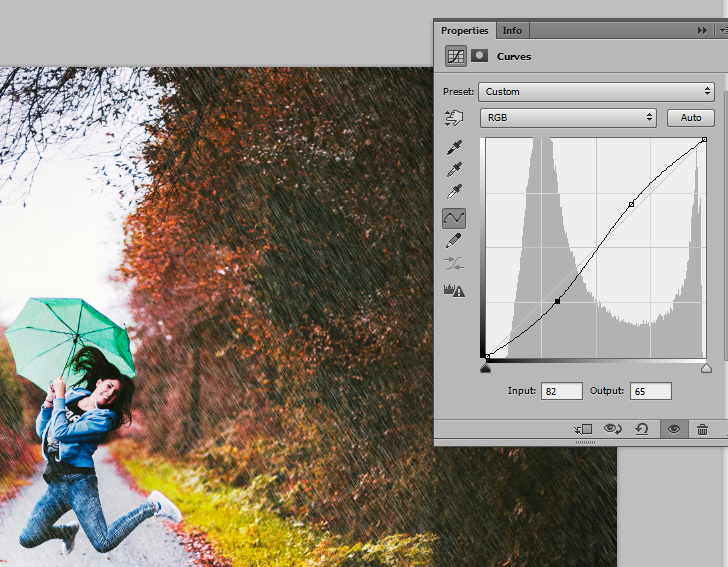
You can use this text effect with other fruits or textures, not only oranges. Sky and creativity is your only limit. To add some final touches you can use dodge and burn tool to add shadows and highlights over the text. Perhaps, you can even change color toning with Curves Adjustment Layers.
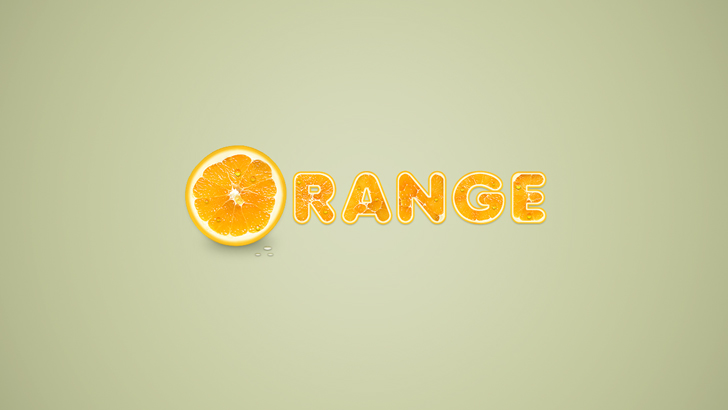
Final Work